Appearance
Installing Evo.NET
The guide below describe the requirements and installation process on Windows Server 2022, but the process is similar on earlier versions of Windows Server and even on Windows 10/11 Professional.
You will need to be logged in as an Administrator on the Windows machine you wish to install the application on. The machine should be able to access the Evolution database, either on a local instance of SQL Server or across the network, and you should have the credentials to log in.
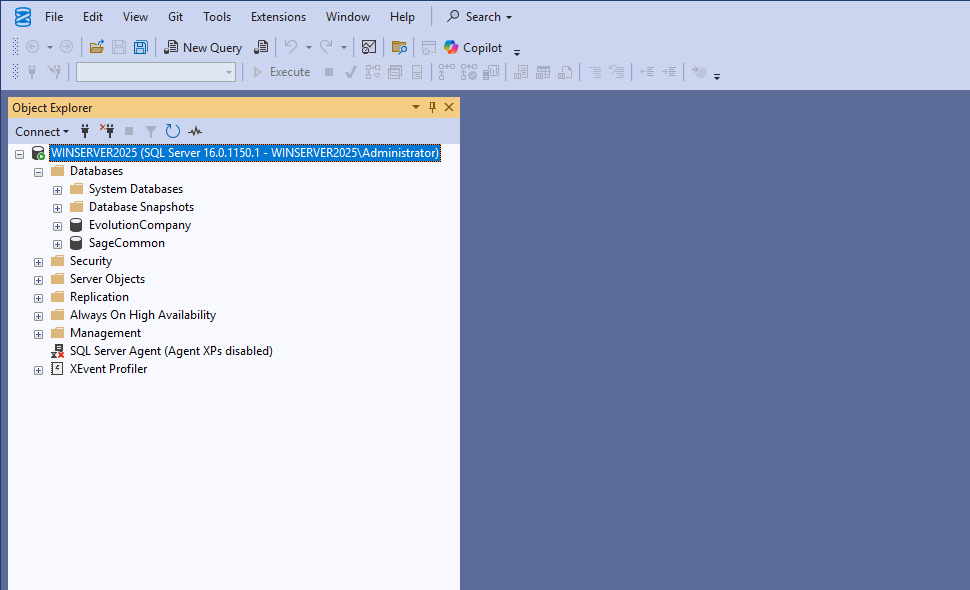
For the purposes of this guide, we will be connecting to a local instance of MSSQLSERVER which has an Evolution Common Database called SageCommon and an Evolution Company Database called EvolutionCompany.
If Evo.NET is to be accessible from the Internet or even from other machines on a LAN, the IP address of the machine should resolvable from a name lookup.
Prerequisites
Firstly, Internet Information Services (IIS) must be installed and running (see Installing IIS). You can test this by navigating to http://127.0.0.1 or http://localhost or opening IIS Manager from the Start Menu.
Then there are two installations that need to performed to meet the requirements of the application.
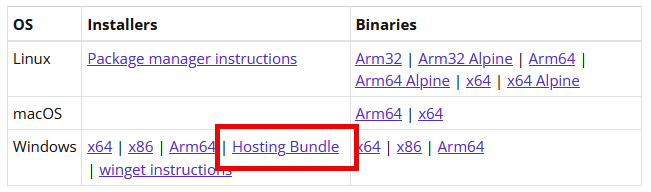
The first is the ASP.NET Core Runtime. Please follow this link to download and install the Windows: Hosting Bundle of the latest version of .NET 10 available. This bundle allows ASP.NET Core apps to run with IIS.
NOTE
IIS must be installed before running this. If IIS was not installed and you subsequently install it, the Hosting Bundle installer must be run (repaired) again.
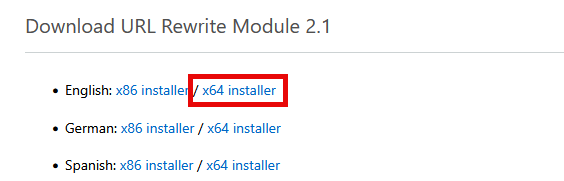
The second is the URL Rewrite module. Please follow this link to download and install the "English: x64 installer". This module, along with configuration in the deployed web.config file, will prevent IIS from trying to handle routes which do not exist and returning 404 errors, instead allowing the UI application to manage its own sub-routes.
NOTE
If you receive the message "The IIS 7.0 CoreWebEngine and W3SVC features must be installed to use IIS URL Rewrite Module 2", please check that IIS is installed.
You can follow these steps to check that the required prerequisites have been installed correctly.
Create the Web Sites
Launch the "Internet Information Services (IIS) Manager" application.
Right-click the Sites node and select "Add Website..." to create a web site for the Evo.NET API. 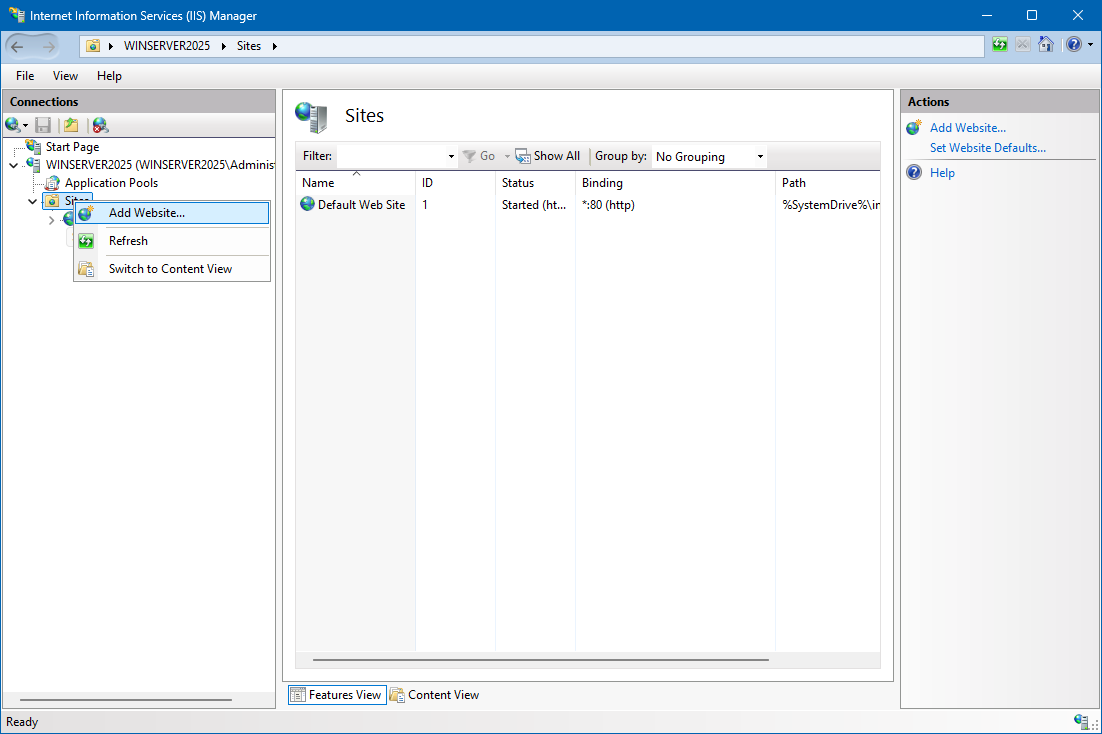
Site and Host Naming Examples for Scopes of Access
| Website | Local Machine [*1] | Local Network [*2] | Internet [*3] |
|---|---|---|---|
| API | api.evonet.localhost | 127.168.0.150:81 or evonetapi | evonetapi.yourdomain.com |
| UI | evonet.localhost | 127.168.0.150:80 or evonet | evonet.yourdomain.com |
| Portal | cp.evonet.localhost | 127.168.0.150:82 or evonetcp | cp.yourdomain.com |
[*1] Local Machine Installations
These instances will not be accessible by any other machine on the network. localhost is a special name that modern browsers are able to resolve the IP address to 127.0.0.1, so creating host names which are sub-domains of localhost makes addressing the websites friendly (e.g. http://evonet.localhost) from your browser. In addition, the Evo.NET IIS Installer will create a HOSTS file entry for that sub-domain so that all Windows network components can resolve it.
[*2] Local Network Installations
If your IIS server is to be accessed my other machines on your LAN and you use a Host Name, that name must be resolvable when that machine enters http://evonet in their browser. That will only happen if you have a local DNS server that all machines are configured to use and you put an applicable entry into the table, or you put an entry into the HOSTS file of every machine that addresses your server.
Alternatively, do not enter a HOST Name and specify a different port for each web site. You will then be able reach the web sites by entering the address http://127.168.0.150:80, for example. This option will require no further configuration on other LAN machines, but is a bit ugly and may also require opening up specified ports on the server firewall.
[*3] Internet Accessible Installations
Enter the Host Name that you have created a DNS entry for. Note that you must create a CNAME entry for each website. When a machine then accesses http://evonet.yourdomain.com, DNS will be able to resolve the name to the IP address of your server. IIS will use the host name that is included in the header of the request in order to route the request to the correct website.
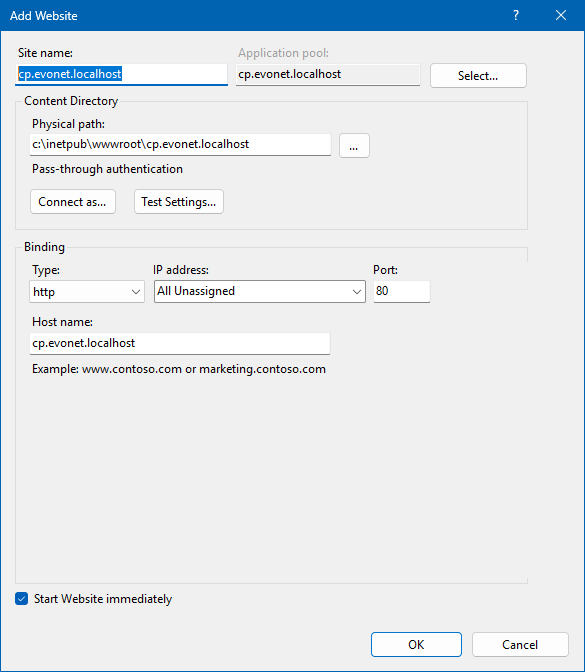
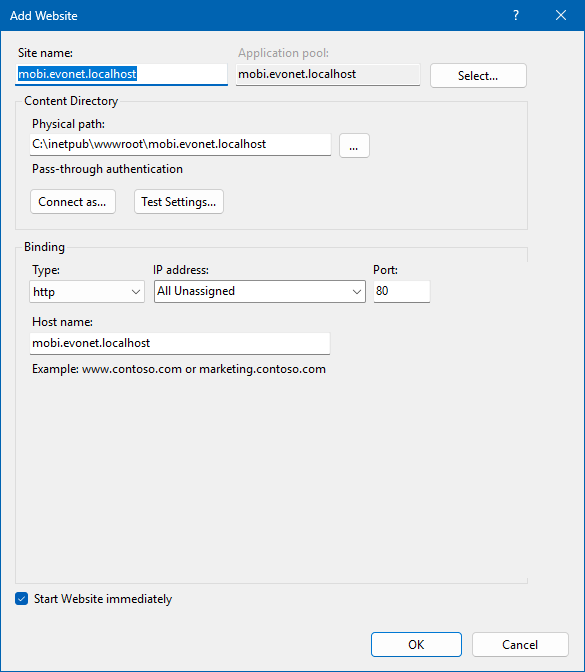
We will create a site that can be accessed locally from this machine by name.

Leave the Application pool as the default new pool.
Browse for and create a new folder for the Physical path where the application's files will reside.
You may leave the Binding Type as http on Port 80 for the purposes of this exercise. If you will be exposing this site to the internet, you will want to add an https binding and specify an SSL certificate.
The Host name is how IIS will identify your site by name from other requests coming into this server on the configured port. If you are just installing on your local machine and only you will be accessing the website, localhost subdomains are an intuitive choice. If you have an Internet-facing web server and a registered domain, you can add a new DNS sub-domain CNAME and set the Host name to that.
Save the new site by clicking OK.
Create another site for the Evo.NET UI. 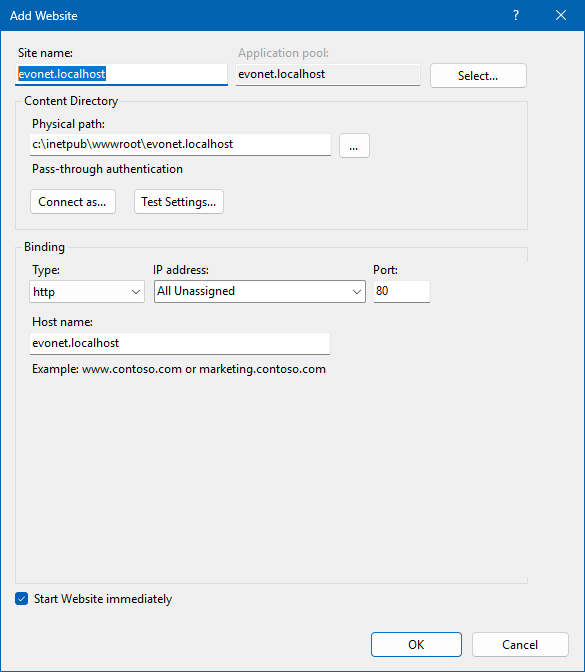
Create a new folder to locate the web site physically. All other settings my be configured similarly to the API.
Save the new site by clicking OK.
Evo.NET IIS Installer
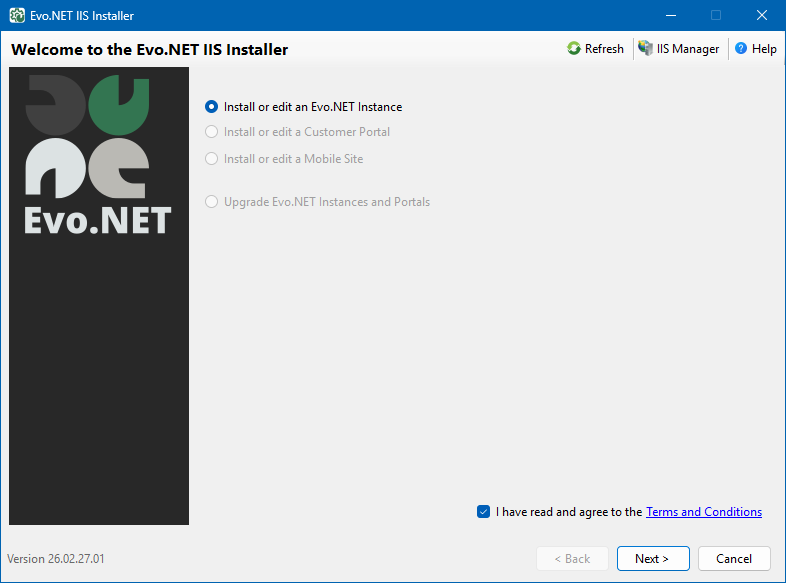
Download the latest Evo.NET IIS Installer .exe from our Evo.NET Downloads page and run it (you will be prompted for Administrator permission).
Terminology
An Evo.NET Instance in this document refers collectively to an Evo.NET API website and an Evo.NET UI website that are required to host Evo.NET, but may also include one or more Customer Portals which access the same API website. A single Instance can be configured to serve multiple Evolution Companies, but if you wish to host multiple Customers' Evolution Companies (each with their own Evolution Common Database) with the same IIS, you can create a new Instance which will group the sites of that Customer together. All websites of an Instance can then be upgraded in one action in order to keep them in sync.
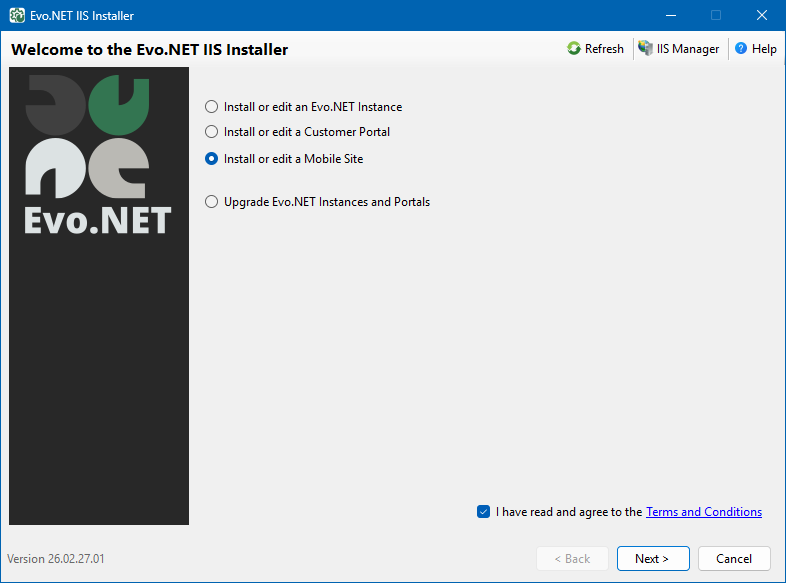
Select Install or edit an Evo.NET Instance and click Next.
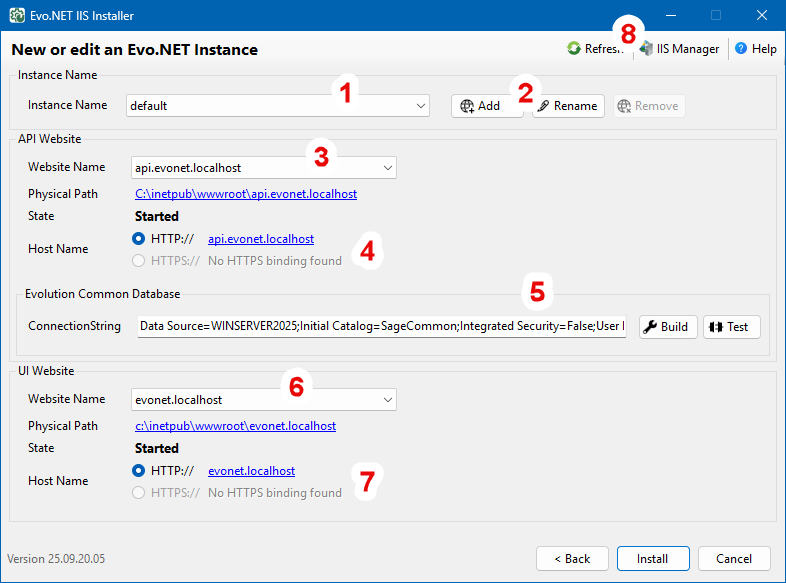
1. Instance Name: An Instance called default will be automatically created the first time you run the installer. Changing this will display the configuration for that particular Instance below. The settings specific to every instance you create will be remembered.
2. Add, Rename or Remove an Instance: Click one of these buttons to perform the associated action. Note: removing an Instance will not delete the websites - only the IIS Installer will no longer remember them.
3. API Website Name: Select the name of the API website you created.
4. API Host Name: Select the website binding you wish to use.
5. Evolution Common Database: Enter a ConnectionString for your Common database. You may click the Build button to launch a simple editor to make input easier.
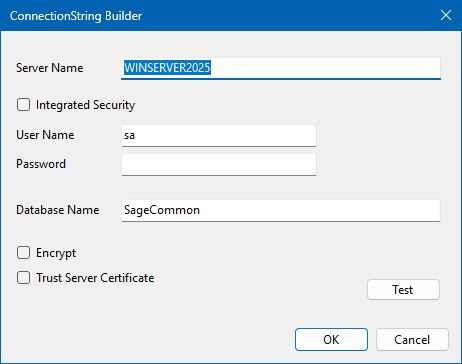
Click the Test button to test if the server is reachable.
WARNING
If, for security reasons, you would rather use Integrated Security, please ensure that you add the user IIS_APPPOOL\<your-evonet-api-application-pool-name> as a db_owner to your SQL databases, as, while the test may work using your currently logged in user credentials, the IIS website ApplicationPool is the user that will run the program under IIS.
NOTE
Your Evolution Common database should contain a valid Evolution licence which must include the SDK Connector module. Please see licencing for more details.
6. UI Website Name: Select the name of the UI website you created.
7. UI Host Name: Select the website binding you wish to use.
8. Menu Bar: Options and utilities. Warning: if you Refresh, please recheck your ConnectionString as it will replace any changes with the currently configured value or the default template.
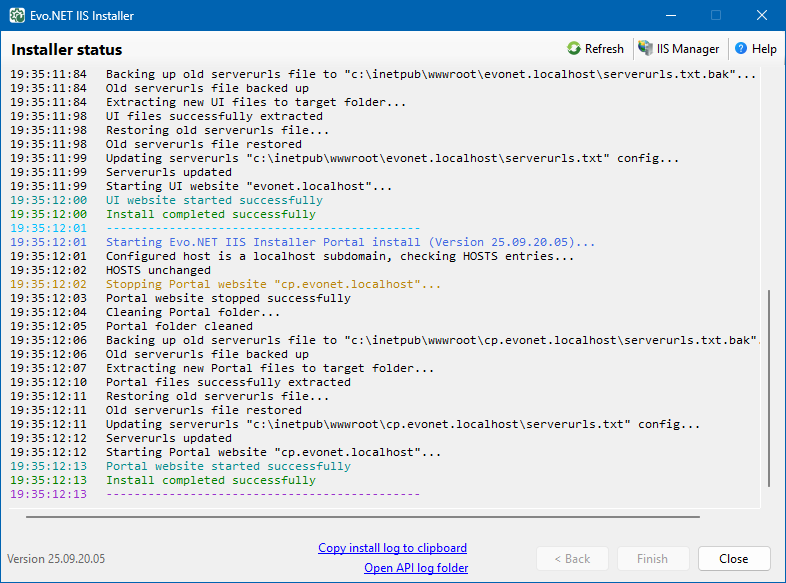
You can now click the Install button to perform the installation. Output from the installer will be displayed in log format.
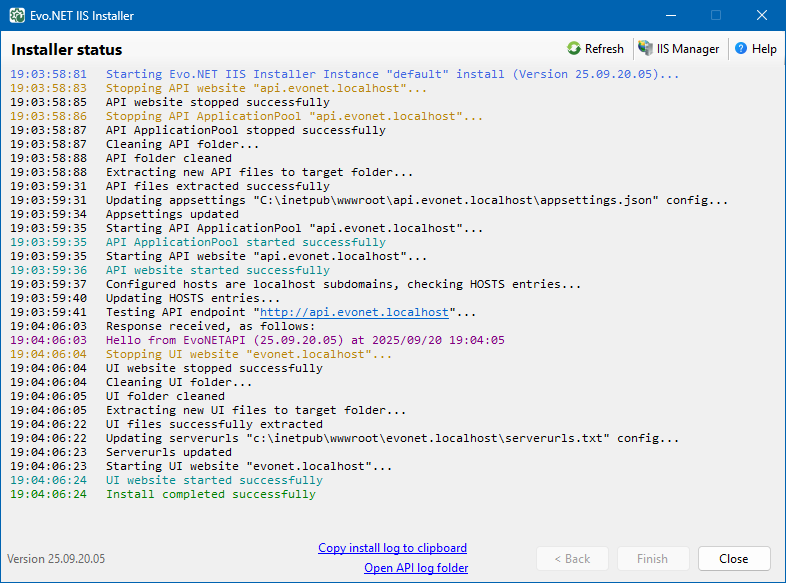
If the installer completed without errors, it will prompt you to launch your default browser and browse to the Host name of the UI web site you created and should get a response without any errors displayed.

If no errors were reported, you may skip ahead to System Configuration to locate your Evolution Companies.
INFO
If the installer reports any errors or the site displays an error message, please see our Troubleshooting API Startup section and Troubleshooting UI Startup section.
TIP
You can run the installer as many times as you like to correct issues without causing any harm.
TIP
Performance of your websites can be greatly improved by following these performance tips.
MANUAL INSTALLATION
If you have problems or want full control of the installation, you can follow the Manual Installation guide.
Customer Portal Installation
Terminology
A Customer Portal is an additional website that you can create, one per Evolution Company, where Evolution Customers belonging to that company can log in and access information pertinent to their account.
First create a new website in IIS Manager.
Run the Evo.NET IIS Installer and select the Install or edit a Customer Portal option.

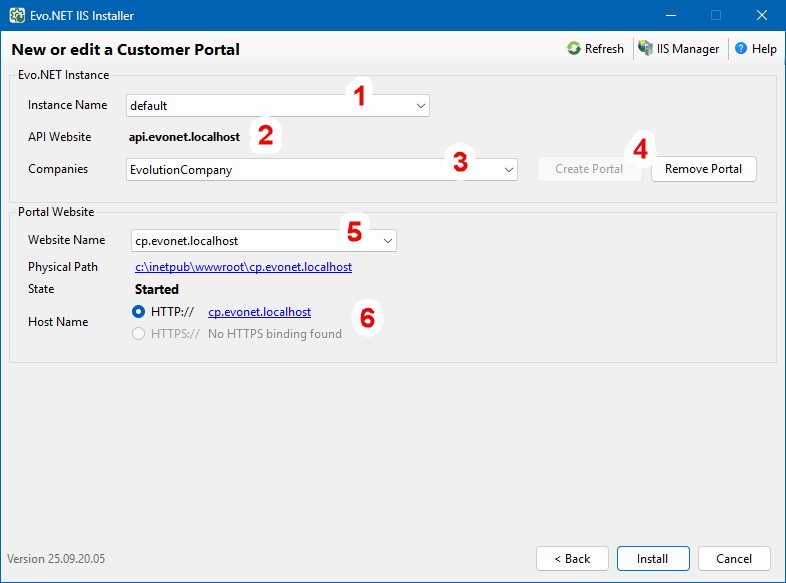
1. Instance Name: Select the Evo.NET Instance from the drop-down for which you wish to create a Customer Portal.
2. API Website: The configured Evo.NET API website name for the selected Instance will be displayed.
3. Companies: Select an Evolution Company from the drop-down. Note: Only Evolution Companies located for the selected Evo.NET Instance will be listed.
4. Create/Remove Portal: If you wish to create a new Portal, click Create Portal - this will then display site configuration controls below for that Company. Note: Removing a Portal will not delete the website - only the installer will no longer remember it.
5. Portal Website Name: Select the name of the Portal website you created.
6. Portal Host Name: Select the website binding you wish to use.
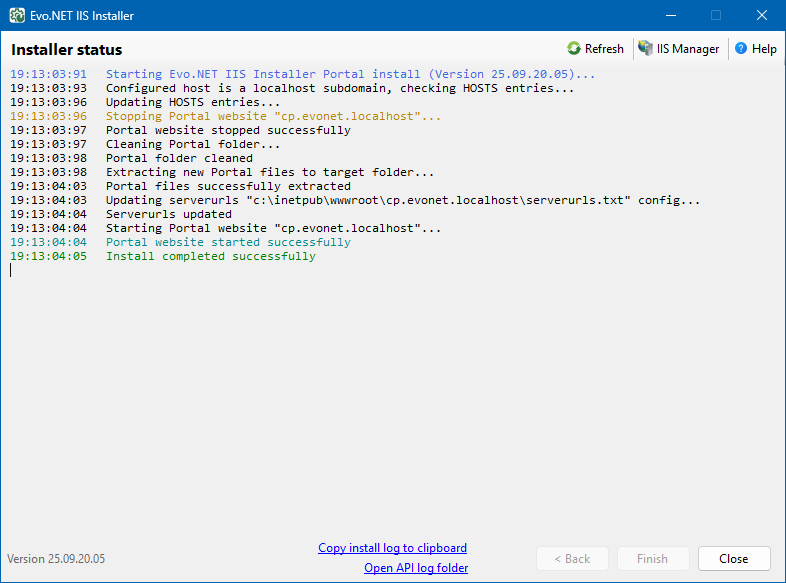
Click Install and accept the prompt to perform the installation. A status log will be displayed.
Mobile Site Installation
Terminology
A Mobile Site is a website application with with a User Interface (UI) specifically designed to be usable on a narrow-screened device. The menus allow the user to easily navigate around the available functionality with their thumbs and the layout of information is designed to take advantage of the form factor.
First create a new website in IIS Manager.
Run the Evo.NET IIS Installer and select the Install or edit a Mobile Site option.
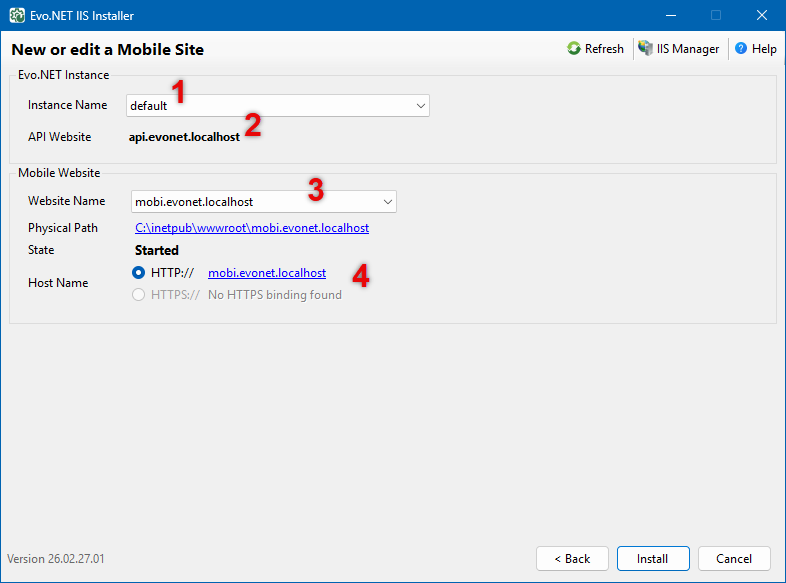
1. Instance Name: Select the Evo.NET Instance from the drop-down for which you wish to create a Customer Portal.
2. API Website: The configured Evo.NET API website name for the selected Instance will be displayed.
3. Mobile Site Website Name: Select the name of the Mobile Site website you created.
4. Mobile Site Host Name: Select the website binding you wish to use.
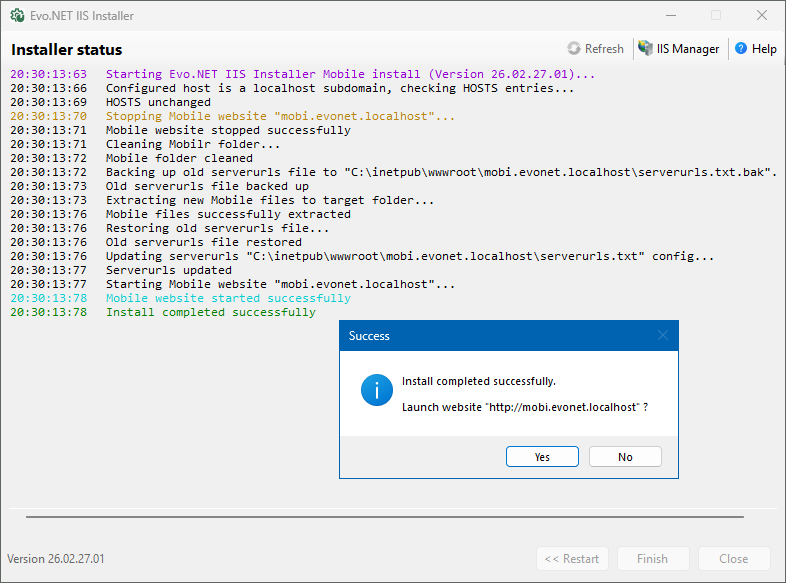
Click Install and accept the prompt to perform the installation. A status log will be displayed.
Upgrading
Upgrading to a new version of Evo.NET is as simple as downloading the latest version of the IIS Installer from the Evo.NET Downloads page and running it.
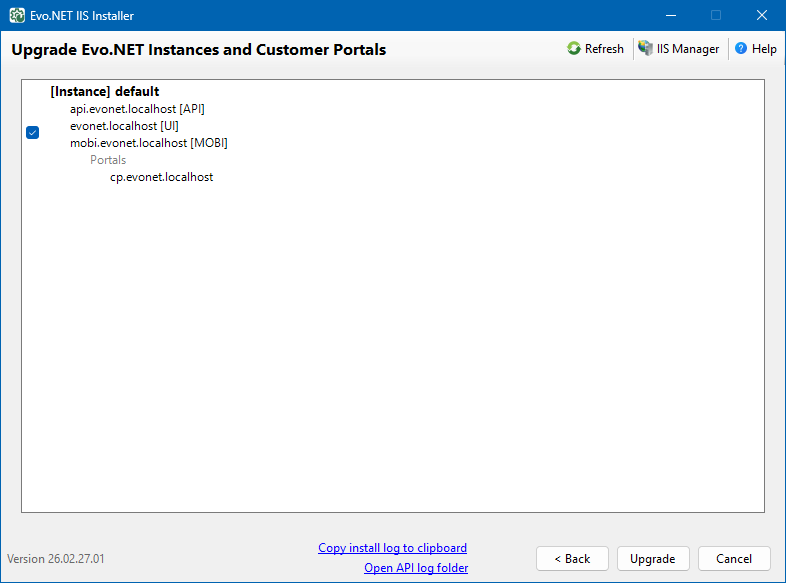
Select the Upgrade Evo.NET Instances and Portals option and click Next.

Select the Evo.NET Instances you wish to upgrade. The API, UI and all Portal websites associated with an instance will be upgraded in a single batch.
Click Upgrade and accept the prompt to perform the installation. A status log will be displayed.